
What is embossing??
Quite simply, it is using a heating tool with specific embossing powder to add a raised look and a glossy or sparkly finishing to a picture.

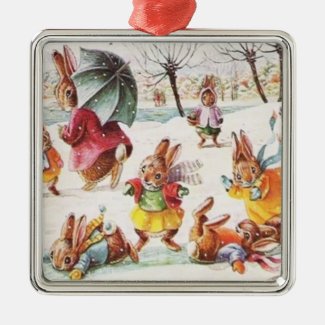
If you would like to make an ornament like the one outlined in this blog post, follow the steps in the directions below.
First, please watch the video below which will demonstrate how to download a picture from Pinterest to use for decoupaging your ornament...
1. Download and print an image onto gift tissue to decorate your ornament with (see video above entitled "Downloading an Image to Word Processing" (the image may be different in the video, but the process is the same).
2. Emboss your image with embossing powder and a clear embossing pen. Using your embossing pen, go over the part of the image you want to emboss just as if you were coloring it (remember, it's clear so you will see the color on the image right through the clear ink after covering the particular part of the image with the pen).
3. Place your printed image over a piece of scrap paper. After opening your jar of embossing powder, sprinkle the powder over the area that you just covered with the clear ink. Use a sparkling powder on things like snow for extra pizzazz!
Sidenote: The clear ink from the embossing pen cannot dry before you sprinkle the powder over it so Step 3 (outlined in the above paragraph) must be done fairly quickly after applying the clear ink so that the embossing powder sticks to it when you heat it up with the embossing heating tool.
 |
| Supplies Needed for Embossing |
It's okay to be generous because the powder will only stick to the wet part of the image, and you will be putting the extra back into the jar in Step 4 below.
4. Save the excess powder by shaking the extra powder off onto the scrap paper (see Step 3 above). To do this, fold the piece of scrap paper that was underneath your printed image before you sprinkled the embossing powder on it. Use the crease you just made to make a funnel for gathering the excess powder into and carefully pour the excess powder back into the embossing powder jar.
5. Take your embossing heating tool and hold it over the area that you applied the embossing powder to on your image. Keep it approximately two inches above the paper and turn it on. Wait for the powder to melt onto the image. It's like magic watching it transform!
Watch the video below to see this process in action...


No comments:
Post a Comment